Alpkit Hunka XL Bivvy Bag

The first time I used the Alpkit Hunka XL Bivvy Bag was inside a tent! On a recent scout camp I decided to try a small lightweight tent that was in the stores and had only been used once before me and I was woken on the first night by a drip that was landing on my sleeping bag. Luckily I had packed the bivvy as I had intended to see how me and my sleeping bag fitted into it before I took it on a #microadventure to iron out any problems with the setup I was planning to use. So I reached over to my bag, pulled the Hunka XL bivvy out and wriggled into it carefully so not to rip it as I was still in my sleeping bag. I was expecting it to make more noise when moving about, but once inside it was very quiet and spacious. While pulling the draw cords (which seem to be a bit fiddly) I found myself staring at a “Made in China” tag, which is a shame as I was under the impression that Alpkit made it all in the UK?

I decided to use this without a tent on an overnight trip to an axe throwing course with some other Scout leaders, there was two reasons behind this decision. Firstly to reduce the weight of my kit by switching a tent for a tarp and bivvy combo, secondly I was fast approaching a trip to Norway and Sweden where I would be spending one night bivvy camping on the shore of Lake Rojden (Which actually straddles the border between the two). It feels like a tardis, so much room inside something that packs down to almost half the size of a British Army bivvy bag. Being breathable you don’t wake up feeling like you have slept in a carrier bag, if you are sleeping in a bivvy bag to stay out of the bad weather you don’t want to end up with a soggy sleeping bag because of condensation.
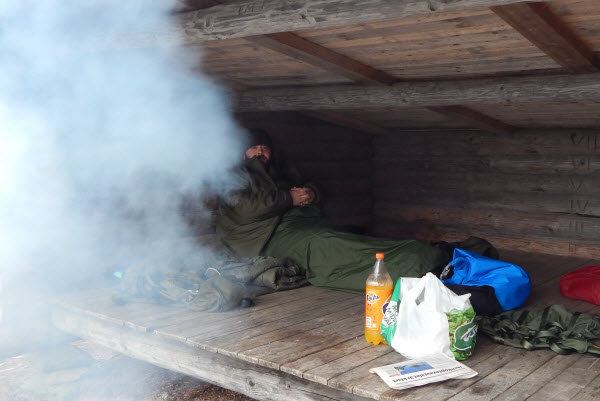
Alpkit-hunka-xl-Norway-trip

Available in 3 different colours Kelp (olive green), Lego (royal blue) and Chilli (red) you can decide to stand out or blend into your surroundings. If you need a slightly smaller (regular) size Hunka is also available. If you are looking to get outdoors and have your own #microadventure Alpkit had a bundle which included the Hunka and a few other items to help get you started, at the point of writing this up it was not in stock.

So after a few uses I think this will be an item that goes in my pack each time I go camping even if I am using a tent, as I have found that it increases the warmth of my sleeping system and it has the advantage of not needing you to get out of your sleeping bag to make use of it unlike adding a liner does. The only complaint I have is they don’t stay in stock for very long, but that just goes to show how popular they are and rightly so.
Posted in Products | Leave a comment

Making a Neck Knife

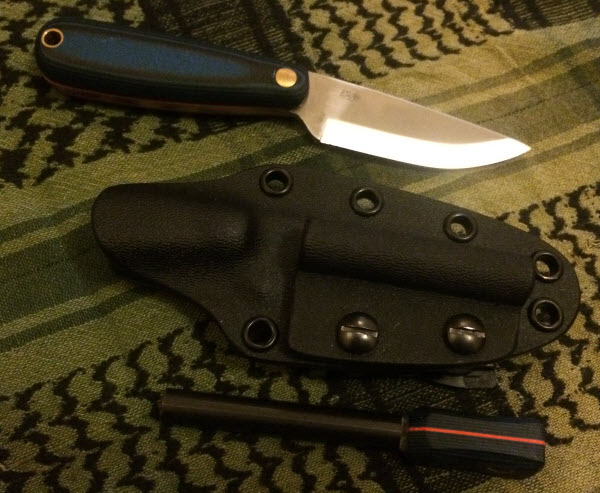
While I have been thinking about what scales I want to use on the bushcraft knife I am slowly building I set about buying some knife blanks to practice handle shaping with. The first one I finished used a Enzo 70 neck knife scandi blank from English Handmade Knives, with Blue-Black G10 scales and Hunter Orange G10 liners.

out of sheath

I cut the scales as close to size as I could and found I had a piece that could be useful somewhere else so I kept it, I then shaped the handle by using the slack underside of the belt (80 grit as that is the only type I can find that fits my grinder). There are a few spots where I caught the back of the ricasso and the side of the blade, this was my first time so I am happy with these few blips.

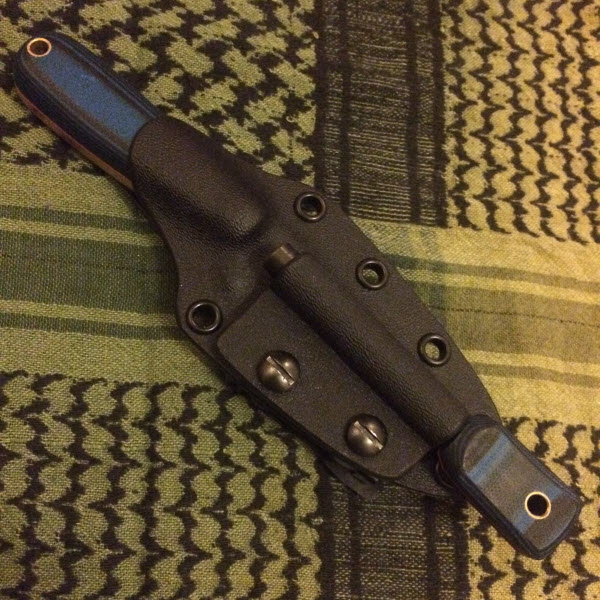
in sheath

That extra piece of scale material I had left over was made into a firesteel handle by Ben Orford who made a Kydex sheath (something I will be trying in the future) for me, I have a few more blanks and will be trying to get more hands on practice shaping handles in the future.

Posted in Cutting Tools, Projects, Survival Kit | Leave a comment

Castaway Challenge 2014

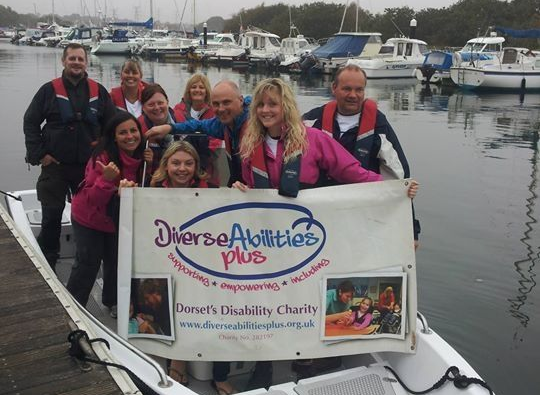
At the end of September I took part in this Year’s Castaway challenge in a mystery beach/woodland location off the South Coast of England to raise funds for Diverse Abilities, Dorset’s disability charity that provides help and support to children and adults with profound physical and/or learning disabilities and their families, through a range of services they offer. This is the second year that I have taken part in the challenge and although I knew what to expect there were still a few surprises thrown in. Throughout the challenge there were various tasks to complete including navigation and survival at sea.

castaway 2014 team

We met up as a team in Bournemouth on the Friday evening and sailed to the mystery location early on the Saturday morning by boats kindly sponsored by Powerboat Training UK and Poole Boat Hire. The team were a great bunch of people and everyone really put 100% effort into the whole challenge. Throughout the whole time Sharon Wells Events Manager for the charity and a team of exceptional, professional instructors were there to teach various aspects of survival and to talk to. The atmosphere in the castaway camp was amazing and there was a lot of laughing going on.

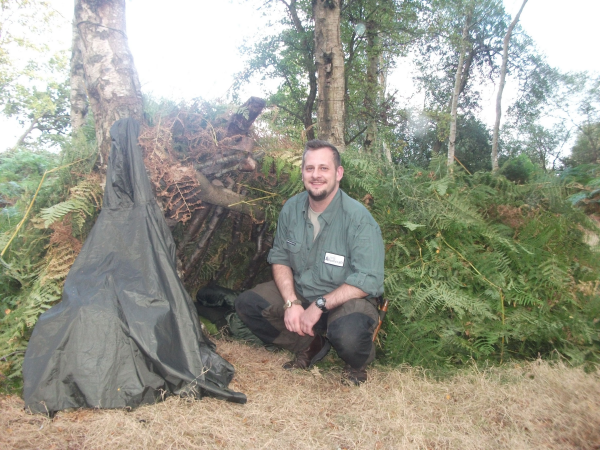
james and his shelter

My personal highlight was when the lead instructor asked me if I wanted to test myself and go off alone to build my own shelter away from everyone else. I put my heart and soul into completing this task, having a rather comfortable night in the shelter I had built with nothing other than what I had foraged from the surrounding woodland and received the ultimate praise later in the challenge when I was asked to come back next year to join the team of instructors.

I absolutely loved doing the challenge again and I would recommend it to anyone, whatever their experience in the outdoors is. I can’t wait till next years challenge when I’ll be there as an instructor. The event raised in excess of £9000 and I felt really proud that we all raised such an amazing amount of money for such a special charity. The 2015 Castaway survival challenge runs from Saturday 19th –Wednesday 23rd September and if anyone is interested in taking part please contact Sharon Wells at Sharon.wells@diverseabilitiesplus.org.uk or on 01202 718266
James Harris
Diverse Abilities Castaway Survivor

Posted in Bushcraft Courses, Cutting Tools, Fire and Cooking, Foraging, General, Preparedness | Leave a comment

Taste the Wild – One Day Foraging Fungi Course

Foraging for Mushrooms is something that I have wanted to do for a long time but I wanted to make sure I was with someone who knows what they are talking about as there are plenty of stories out there of what happens it you eat the wrong ones. So when my cousin said he had booked us onto a course with Taste the Wild it seemed it was the ideal time to begin learning about the interesting and often misunderstood world of Fungi Foraging.

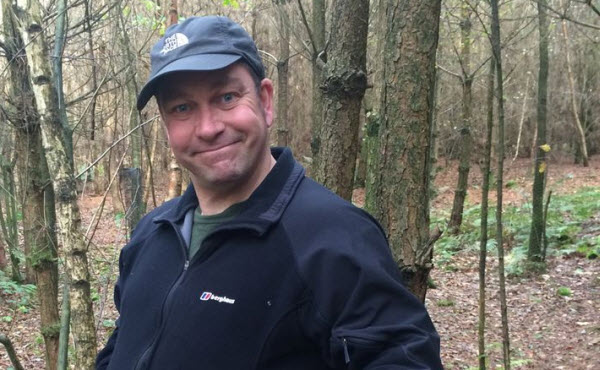
fungi-tony

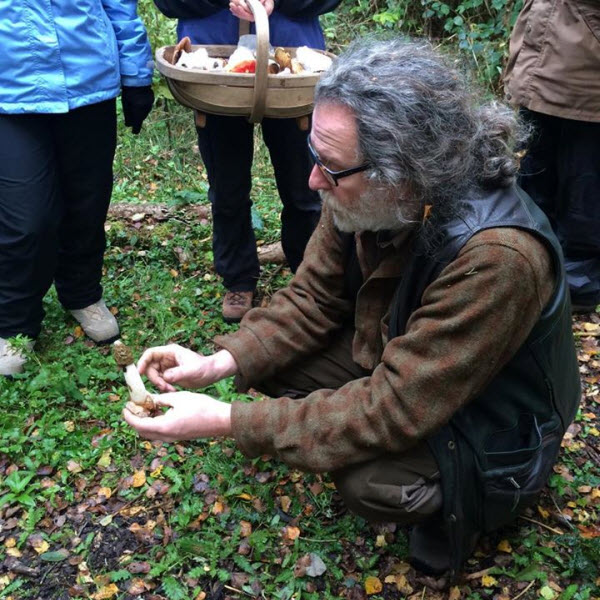
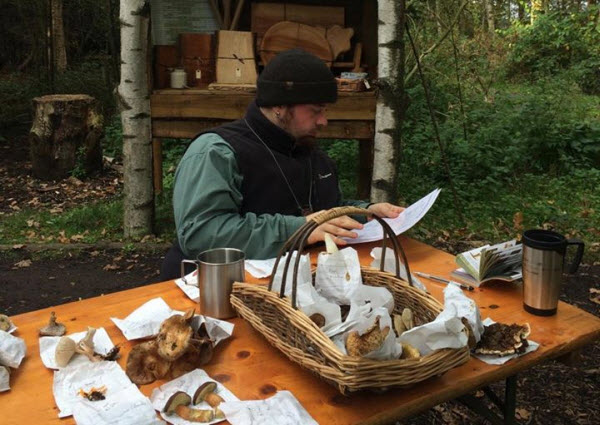
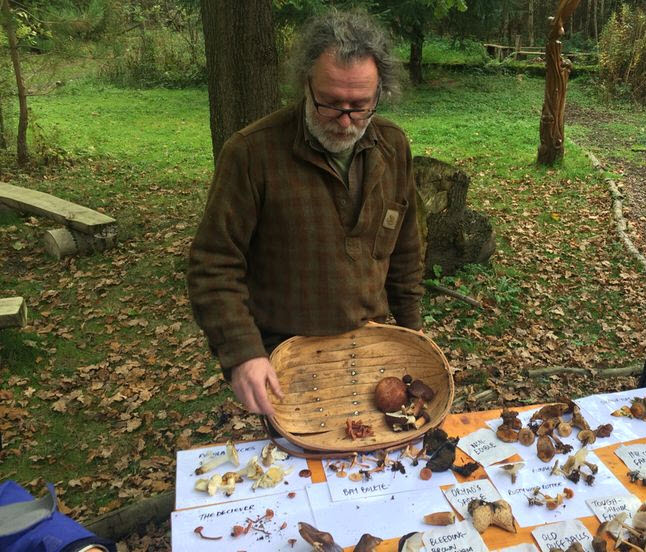
On the morning of the course we arrived at the venue in Boroughbridge and was greeted by Chris who directed us along the path from where we parked up to where Rose was making Tea & Coffee for other participants. We all chatted until Chris and the last few participants joined us, sitting around a plate of biscuits Chris then began the orientation talk. He started with introducing himself and Rose, Taste the Wild & the other courses they run, house keeping for the site and what we would be doing on the course today. Chris explained how we should collect the Fungi, what information we should record on the paper bag we were putting them in and explained some of the terms used that can determine one species from another on an almost identical looking specimens.

Photo credit Tony McCawley

Photo credit Tony McCawley

We were then given baskets, bags, pens and went off on a route in the woods. Chris demonstrated the process for everyone and then in pairs we settled into sections and started the hunt. I say hunt because that is what it felt like, you have to take some time to slow your mind down and focus on methodically scanning for anything that stands out from the leaf litter the covers the woodland floor like a carpet. Soon enough you are in your stride spotting, collecting, recording information & double checking what the smell is before moving onto the next one. More often than not I recorded a Mushroom as smelling mushroomy! Some then smelt creamy like Heinz Cream of Mushroom soup, one was like coconut milk and another smelt like gloss paint. My favorite smell reminded me of Pickled Onion Monster Munch.  Coming up to lunch time we started to head back to the base camp area, stopping every minute or so to examine and collect another specimen.

Once we returned we all took a seat round the table with a fresh brew and Chris began to explain the ID process starting with the spore print, dimensions, gill attachments and where it was growing. This is where some doubts started to form in my mind, what if I make the wrong ID? What’s worse getting poisoned or missing out on a tasty mushroom because I was over-cautious?

Photo credit Tony McCawley

Photo credit Tony McCawley

I needn’t have worried as under Chris and Rose’s careful eyes we worked our way through the basket, it was much easier than I thought if you follow a few steps. It is so easy to just check a few things and make a decision, with the desire to make it fit a similar description just because you wish to eat it. We worked our way through about a 3rd of the basket and then it was time for lunch, which consisted of Mushrooms. Chris had prepared a treat with some cured and marinated mushrooms, mushroom soup and bread cooked in the mud ovens in the base camp.

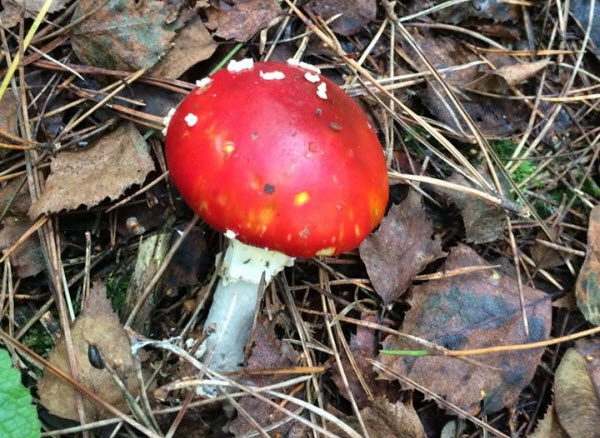
After lunch we did a bit more ID and enjoyed some lovely fruit cake before going on another walk to look to see some other fungi that while not edible are useful in the outdoors for fire lighting, while we didn’t see any horse’s hoof fungi we did find some cramp balls and then made an ember on this to demonstrate how fire could have been moved from one site to another in prehistoric times. We also learned of a connection between Christmas and the Amanita Muscaria mushroom, which you can read up on here.

Photo credit Tony McCawley

Photo credit Tony McCawley

Another thing we learned was learned that you can be thrown curve balls from time to time when in a field area we found a species that is normally found growing in wooded areas, Chris explained that in this area Rose had made a large number of sculptures using a chain saw. While I do not doubt that if we had followed the ID process we would eventually have reached the correct conclusion, but the added detail of the unique soil makeup would help you rule out a few choices first speeding up the process.

Photo credit Tony McCawley

Photo credit Tony McCawley

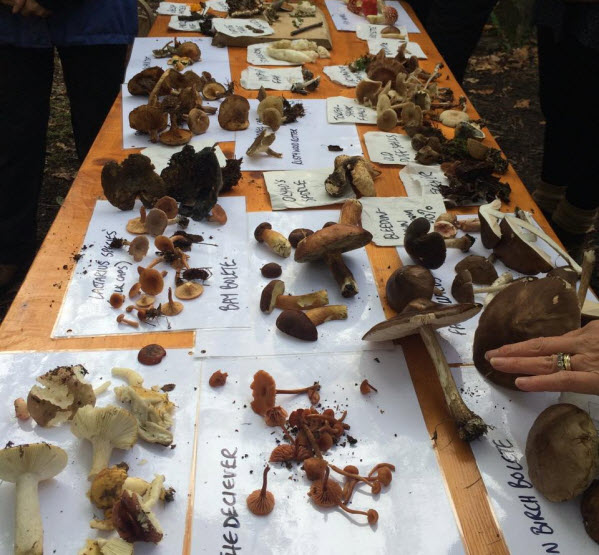
When we returned to base camp our collective find was laid out on a table, then a few edible species were fried up in butter with some salt and pepper which were then shared around the group. The mushrooms tasted great and it was a pleasant way to finish the course with a belly full of the mushrooms you picked yourself.

fungi-chris

I enjoyed my day with Taste the Wild and would highly recommend their fungi foraging course if you are wanting to start exploring the wonderful world of mycology or you just want to spend time in the woods learning new skills with two people who are passionate about what they do. To book yourself onto a course or to see what other courses you can book visit the Taste the Wild website.

Posted in Bushcraft Courses, Fire and Cooking, Foraging | Leave a comment

Fruit infused Booze

After sampling some rather nice Damson Gin earlier this year (Skal Julian) I decided it was time I infused my own boozy drinks, so I started to research recipes and methods. It also coincided with my 4th wedding anniversary and the traditional gift is fruit, OK fruit and flowers but I find flower infused drinks taste perfumey.

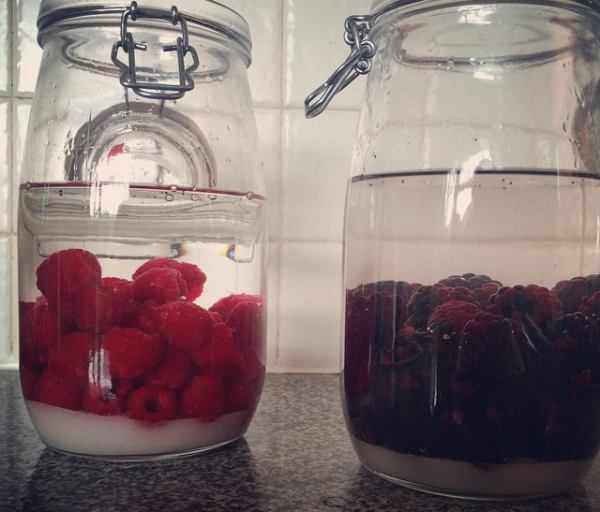
I found a post on Badger Bushcraft for blackberry vodka and used it as my starting point when making blackberry gin, I adapted it to make a batch of raspberry vodka at the same time.

infusing-booze

A few days later I decided to look at what else I had in my drinks cabinet and what I can make from it, so with some Jack Daniels I started to make Coffee Bourbon after finding the recipe on boozed and infused. This was a small batch and I found that after 2 weeks of infusion it was ready, which was good as I was looking forward to trying this one the most.

So back to the fruit infusions, about half way through the infusion time I took the bottles out to give them a taste test so you can see if any thing else needs adding, I decided I would add more sugar as I prefer a sweeter tipple and makes it very drinkable indeed.

I have also been experimenting with various other ingredients and infusion times, my favorite being a tie between strawberry white rum and cinnamon whiskey. A batch of Badger Bushcraft inspired Christmas Spiced Brandy is underway waiting for Christmas day, I had some plums in the fruit bowl so I used them instead of blackberries and on a taste test the flavors are coming along nicely.

All I need now is a campfire to sit around while I enjoy my infused booze with good company.

Posted in Fire and Cooking | Leave a comment